
Scrapbooking with Very 3D Objects

I love to scrapbook and I like to have my pages in the plastic sleeves, but 3D objects don't work very well in them.  Well, I was determined to come up with a solution so that I could put my baby girl's hat and id bracelet in her scrapbook.
First, I cut out a square where I wanted her hat to go out of some cardboard/fiberboard stuff. I also trimmed the top side and the right side a bit.  I would say it was about 5 mm.  I did this so when I slide this "thicker" sheet into the sleeve it has room.  The thicker you make it, the more you have to trim off the sides.
Then on a second piece of board I cut out strips of card stock (out of a hideous hot pink I hate and never use) and glued them on. I ended up using 3 sheets of card stock.
I cut out 12 strips and glued them together for the thickness I wanted. I added 3 squares to make it more sturdy and actually added one more in the lower right after I took the picture. You could lay down 12 sheets and just cut out the squares, but that would waste a lot of paper.
Then glue the top layer on.  Actually, you should cut out the squares on your top/cover paper first before you glue it down so you can make a nice hole.  I forgot to do it, so it made it a bit more challenging.
So to hide the layering, take a beautiful piece of scrapbook paper and lay it in the hole...make it a little bigger so it can go up and over.  Cut a small diagonal at the corners to help ya.
Press it down (I used a pencil to help) and it should look like this.
Then glue them down so it looks like this.
Here is a zoomed out shot.
Then take your top paper (that you hopefully remembered to cut the hole out of earlier before you glued the board on....unlike me) and glue it on.
Then place your object in.  Now my hat did stick up a little bit, but when it is in the plastic sleeve it squishes down perfectly.
It sits just right!
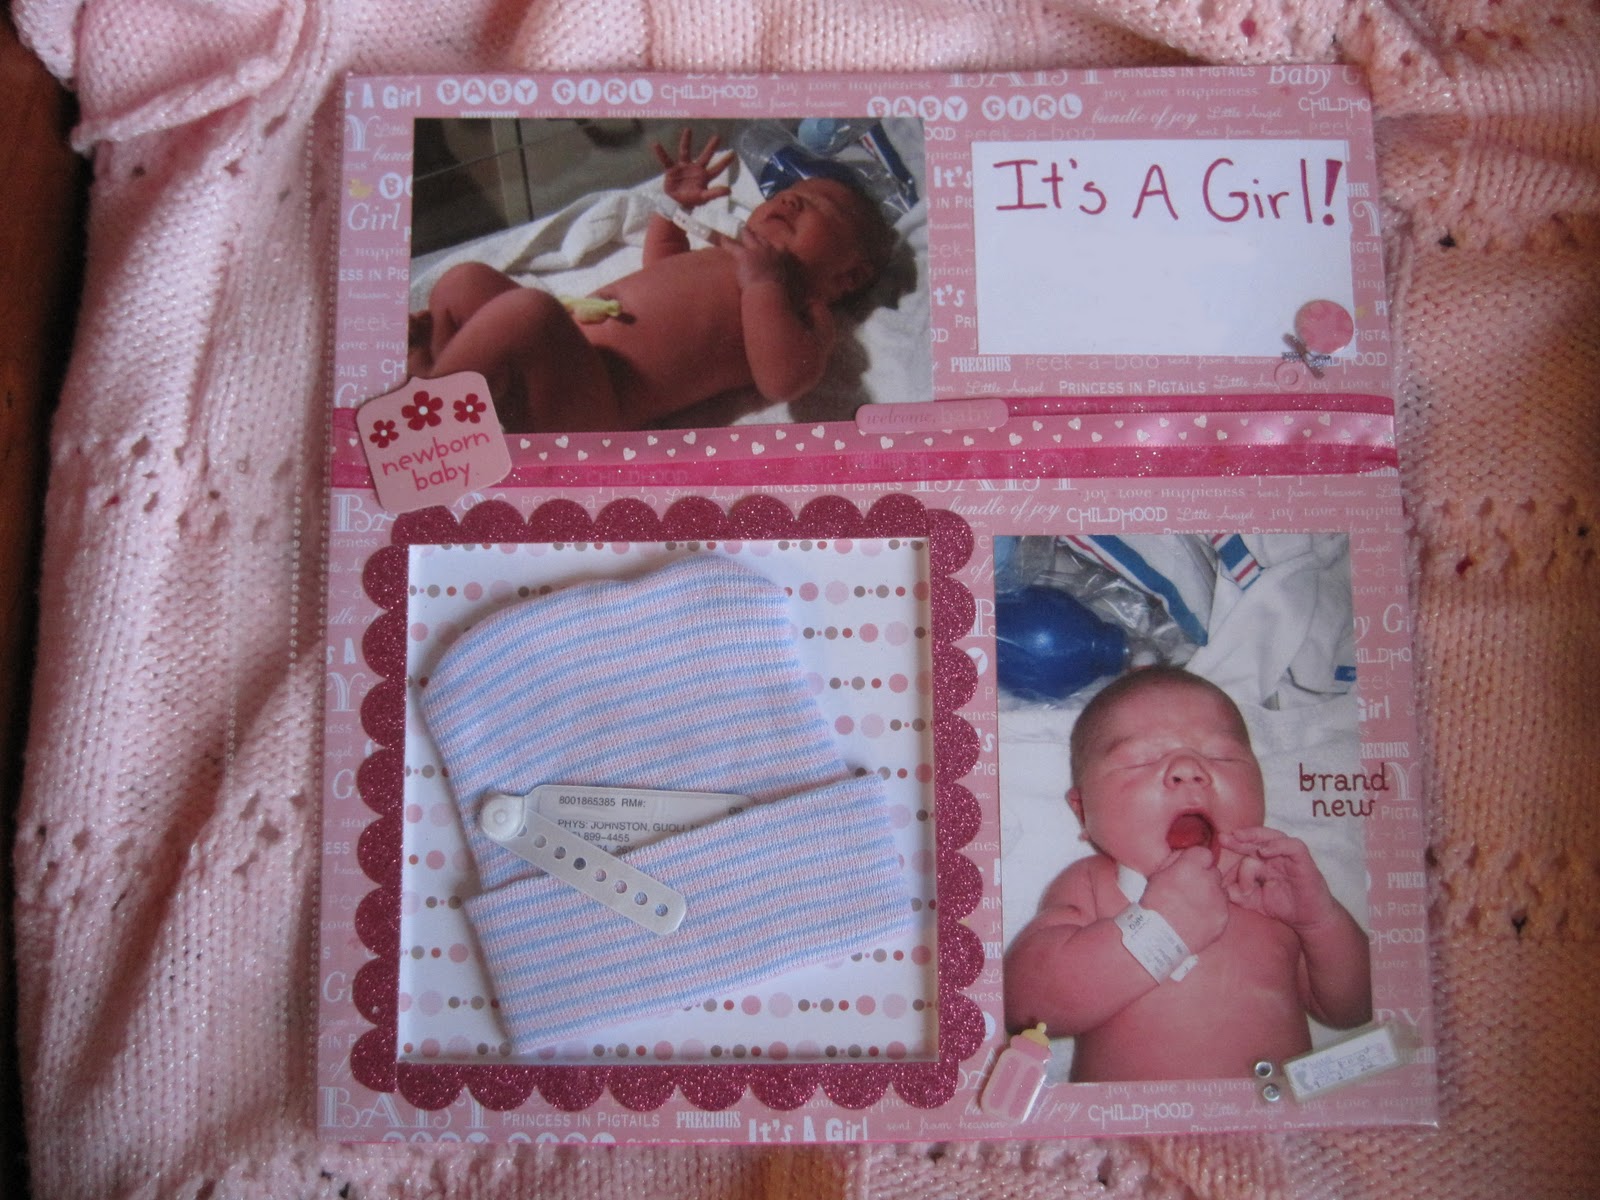
Then add those wonderful embellishments and put it in the plastic sleeve and you're done!  Now if only I could fit a blanket in there....hummmmmmm.

Comments

Popular posts from this blog

Valentine's Day Wreath

Now that the Christmas decorations are down, it is time to make some Valentine's Day decorations to put up! I have seen some in the store, but it is much more fun to make your own.  So here is how I made my sweet heart wreath. First you need a hoop (the one I used had about a 7 in diameter), 7 big wooden hearts, 8 small wooden hearts, paint, glitter, ribbon, and some hot glue. I took all my hearts and painted them a solid color and then went back over them and made some patterns or outlined them. I thought they were looking a little boring so I went back and put some glitter on random ones. Then I went around and hot glued the big ones and tried to make them as evenly spaced as possible. Then I hot glued the smaller ones on top of the bigger hearts, tied some ribbon, and then hung on my door!

Scrapbooking, First Solo

I can't believe how much time has gone by since I last scrapbooked.  Well, I finally have been inspired to scrap again and I found a fun challenge with a very happy mood board that got my creative juices going again. Recently, my daughter got to dance her first solo on a stage.  I had only seen her dance this when she was first learning this.  She had a broken wrist at the time, so I never had seen some of the moves until she danced it on stage.  It had been over a year since she was on a stage and she has never been on one all by herself.  I wasn't sure how she was going to do.  I could tell she was getting nervous, but she did a beautiful job.  I was a very proud mommy.  =)  I really wanted to add one more picture, so I added this photo on a pull out tab.  I always enjoy the pages that have a little interactive part to them. While the paper I used for this layout was all new, all the embellishments are things that I have had for a long time.  I used some old stickers, wooden

Scrapbooking, Adore

    Every once in a while, I make a layout that I absolutely love and this is one of them.  I think it might be the rainbowness of it all that I love.  This is really a random photo of my daughter that I took while we were waiting for the bus.  I played with the photo on my phone and made it more rainbowy.  I really like how it came out, so I printed it out for my project life, but then I decided it needed its own page.  It really is a random page for a random photo.     This is my page for the Memory Nest . The circles on the sketch were my major inspiration.  I felt that they would make a fun background.  At first, I changed the circles to triangles and then I noticed all these old frames on my desk.  I'm a chipboard frame hoarder. lol.  I thought most of the frames were really ugly or they had patterns that I would never use.  At first, I was going to just paint the frames white, but then I decided to make them gray.  I'm glad I made them gray because now they