Scrapbooking, Pumpkin Patch

PumpkinPatch2
 
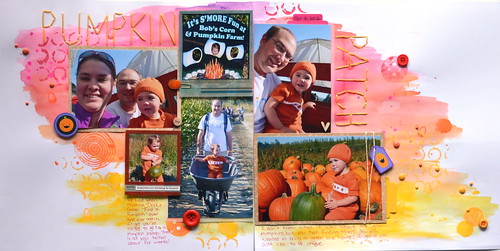
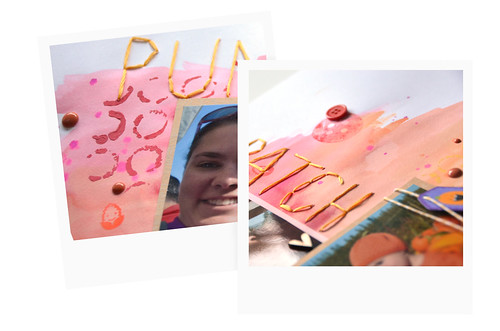
I loved how the water color background turned out for my son's page so much, that I had to try it again.  This time, I thought I would make a two page layout for my daughter's book since it has been a very long time since I've tried one.
 
I wanted to scrap these pumpkin patch pictures from last year because we were just about to go to the pumpkin patch again and I thought they would help me get into the fall mood.  I just love fall, but the weather in the pacific northwest is so unpredictable this time of year.  You never know if there is going to be a sunny day to go pumpkin picking so you have to take advantage of one when it comes!
 
Scrap Our Stash had their Tic Tac Toe challenge again, so I thought I would give it a go.  I went right down the center and did 3 buttons, decorative pins, and wood veneers.  I scattered buttons randomly onto the page.  I used up the little joy pin from Little Yellow Bicycle that I had laying around still.  I also added a little wooden heart.  I wanted to add more wooden veneers, but nothing else would cooperate with me.
 
PumpkinPatch3

Comments

  1. You absolutely rock! All the things I love at the moment are on your page - paint wash, stitching and orange! Great job and thanks so much for joining in our tic tac toe fun!. xx

    ReplyDelete
  2. Awesome watercoloring, and title work..love the stitching! Wonderful 2 page layout and take on the Tic Tac Toe challenge! Thank you for joining us at Scrap Our Stash!

    ReplyDelete
  3. Absolutely gorgeous! I love the watercolor! Thank you so much for playing along at SOS!

    ReplyDelete
  4. Love the watercolor background and the stamped circles! Such a different take on a pumpkin patch layout! Thanks for playing tic-tac-toe with us at SOS!!

    ReplyDelete
  5. Love the watercolor background! It looks so amazing! Thanks for playing along with us at Scrap Our Stash!

    ReplyDelete
  6. Love the colors you chose, this is amazing!!!! Thanks for playing along with SOS!
    e.

    ReplyDelete
  7. WOW!!! The water colors are absolutely gorgeous! I am so inspired by your layout and the stitching is fabulous! Wonderful take on the stash challenge! Thanks for playing along with us at Scrap Our Stash! :)

    ReplyDelete
  8. Wow!!! your two page layout is amazing,love the fun photos and the colors and the title stitching really rocks! Thank you so much for linking up at Scrap our Stash!

    ReplyDelete
  9. GORGEOUS, Saskia. You def have a knack for watercolors. Makes me want to try that technique. Great layout.

    ReplyDelete
  10. fantastic double page layout! love the water colors! Thanks for playing along with Scrap Our Stash!

    ReplyDelete
  11. Ooooh! I love this! Love the paint and what a great way to tie a 2-page LO together...super job! Thanks for playing with Scrap Our Stash!

    ReplyDelete
  12. Thanks for sharing the best information and suggestions, it is very nice and very useful to us. I appreciate the work that you have shared in this post. Keep sharing these types of articles here.
    paranormal romance blog

    ReplyDelete
  13. Impressive and powerful suggestion by the author of this blog are really helpful to me.
    marriage advice blog

    ReplyDelete

Post a Comment

Popular posts from this blog

Scrapbooking, Adore

    Every once in a while, I make a layout that I absolutely love and this is one of them.  I think it might be the rainbowness of it all that I love.  This is really a random photo of my daughter that I took while we were waiting for the bus.  I played with the photo on my phone and made it more rainbowy.  I really like how it came out, so I printed it out for my project life, but then I decided it needed its own page.  It really is a random page for a random photo.     This is my page for the Memory Nest . The circles on the sketch were my major inspiration.  I felt that they would make a fun background.  At first, I changed the circles to triangles and then I noticed all these old frames on my desk.  I'm a chipboard frame hoarder. lol.  I thought most of the frames were really ugly or they had patterns that I would never use.  At first, I was going to just paint the fram...

Scrapbooking, First Solo

I can't believe how much time has gone by since I last scrapbooked.  Well, I finally have been inspired to scrap again and I found a fun challenge with a very happy mood board that got my creative juices going again. Recently, my daughter got to dance her first solo on a stage.  I had only seen her dance this when she was first learning this.  She had a broken wrist at the time, so I never had seen some of the moves until she danced it on stage.  It had been over a year since she was on a stage and she has never been on one all by herself.  I wasn't sure how she was going to do.  I could tell she was getting nervous, but she did a beautiful job.  I was a very proud mommy.  =)  I really wanted to add one more picture, so I added this photo on a pull out tab.  I always enjoy the pages that have a little interactive part to them. While the paper I used for this layout was all new, all the embellishments are things that I have had for a lon...

Car Roll Tutorial

  November is such a crazy time.  There are so many projects that have to be made for birthdays and Christmas.  Making things is so much more fun then buying something random.  Anyways, I made this cute car roll for Moose's best buddy's 2nd birthday.  I'm loving how it came out and her friend has been having a blast putting his hot wheels in the little pockets.  So here is how I made it so you can make one too!  I don't have photos for every step because Moose was "helping" me the entire time and I couldn't juggle her and a camera very well.   Supplies: 1/4 of a yard of green fabric 1/4 of a yard of some fun print fabric Batting (about 16 inches by 9 1/2 inches) 5 Pieces of scraps of fabric at are 4 inches by 4 1/2 inches Felt for roads, dirt, and water (I used the felt rectangle pieces you see everywhere in craft stores) Bias Tape Button Elastic or a hair tie  Step 1: Cut ...